The formula · Outfit Formulas
A Knit Over a Collared Shirt: Gauge, Spread and Shoulder Seam
Collar spread, knit gauge and shoulder seam decide whether a knit over a shirt looks deliberate. The measurements to compare before you layer the two.

A knit over a collared shirt fails at three points at once: the collar points curl under the neck, the shirt bunches at the armhole, and the cuff disappears. Each is a measurement rather than a matter of taste, and each can be checked in a mirror before the knit goes on. The order to work through them is collar, gauge, then armhole: the first two can be checked in a mirror, and the last only by moving.
The collar has to fit inside the neckline
Measure the collar flat, point to point across the front, then measure the knit’s neck opening flat across the front of the crew. The opening needs roughly half an inch more than the spread. A point collar with 2.75-inch points and a 3-inch spread sits close to the neck and drops under a crew without touching it. A spread collar at 4 inches needs a 4.5-inch neck opening, which is rare on a crew and common on a V-neck.
The collar spread that survives a jacket is not automatically the one that survives a knit. A wide spread is cut to sit outside a lapel, and a knit neckline has no lapel to hold it. A button-down is the reliable choice because the buttons keep the points down while the knit goes over the head and off again. Without them, the points catch on the neck rib and fold upward, and a point that folds under a wool rib tends to stay folded.
Gauge sets how much the shirt is compressed
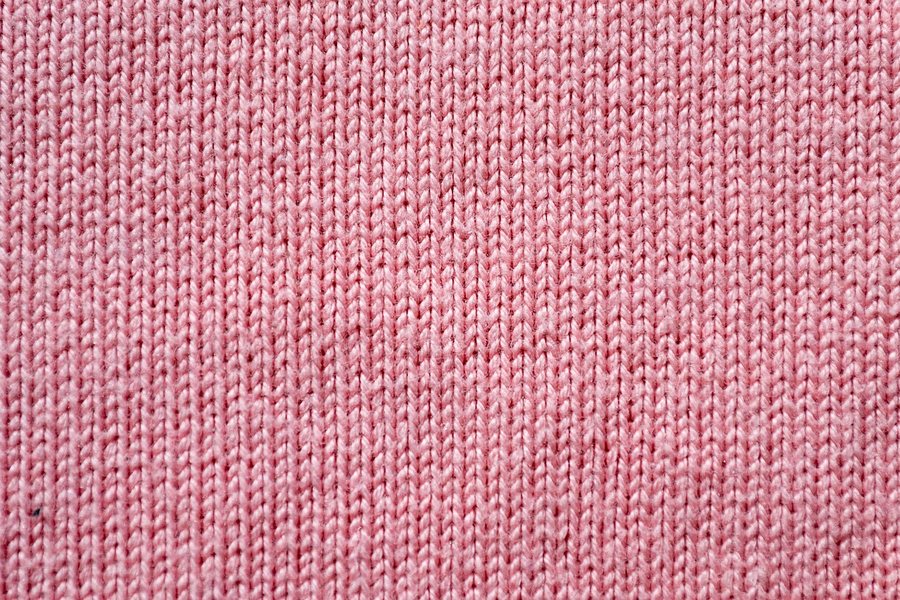
Gauge counts needles per inch on a flat knitting machine, so a higher number means a finer cloth; 3 to 14 gauge and what each is for sets out the range. A 12-gauge merino is around a millimeter thick and passes over a cotton shirt without pressing on the collar. A 7-gauge is closer to two millimeters and flattens the chest of the shirt, which shows as a dull panel where the knit sits. A 5-gauge at three millimeters does not layer over a shirt at all: the shirt bunches at the armhole and the knit stands away from the back.
What matters at the neck is whether the knit has a rib that grips and recovers. A fine knit with a 1x1 rib holds the collar in place; a coarse knit compresses the collar so hard that the points splay outward under the fabric, and the top button shows through as a bump. A knit with a rolled or raw neckline has nothing to hold the shirt at all, and the collar works its way out within an hour.
The armhole is the real constraint
A shirt and a knit each have a chest circumference. Worn together, the knit has to clear the shirt’s chest plus the thickness of the shirt itself. A knit cut close to the body has no ease to give, so the excess travels to the armhole, where the sleeve meets the body. That is why a knit that fits perfectly over a T-shirt can be unwearable over an oxford: the difference is not the chest but the armhole seam, which has nowhere to expand.
Put the shirt on, then the knit, and raise one arm to shoulder height. If the knit’s armhole cuts into the front of the shoulder, or the shirt sleeve pulls the knit’s sleeve up with it, the armhole is too small and no amount of steaming will settle it. Sizing up adds length as well as width, so it moves the hem down and the shoulder seam out; that trade is worth taking only if the knit’s shoulder is already close.
The neckline and the shoulder have to agree
A shirt’s shoulder seam sits on the point of the shoulder. A knit worn over it needs a set-in seam within half an inch of the same point, or a deliberate drop that reads as a design choice rather than a size error. If the knit’s shoulder is narrower than the shirt’s, the shirt seam rides up underneath and leaves a ridge across the top of the arm. If the knit drops 2 inches past the shoulder, the sleeve stacks at the elbow and the shirt cuff disappears inside it.
Measure the knit flat, seam to seam, and compare that figure with the shirt’s, not with your own shoulder width. Set-in and dropped shoulders need different sizing on the same body, and layering doubles the error, because the knit’s seam has to clear a shirt seam that is itself sitting on the bone.
Cuffs and hems at the two ends
Half an inch of shirt cuff below the knit cuff is enough. More looks like the shirt sleeve was pulled down; less looks like the shirt is short in the arm. A ribbed knit cuff grips the shirt sleeve and keeps that half inch in place. A plain cuff lets the shirt slide back up the forearm by mid-morning, and the cuff disappears.
At the hem, the shirt should finish at least 2 inches below the knit, or not show at all. Two hems within an inch of each other read as an error, because the eye takes them as a doubled line. If the knit ends at the waistband, tuck the shirt; if the knit covers the waistband by 2 inches or more, leave the shirt out. The order of two weights makes the same point from the other direction: the outer layer has to be the one with room to move.
When the formula fails
The formula assumes a shirt with some slipperiness and a knit with some ease. It fails on a heavy oxford, where the collar is built to stand on its own and will not lie inside a crew. It fails on a fused collar, which cracks rather than folds when compressed. It fails on a knit that has felted in the wash, because a felted knit has lost the stretch that let it pass over the head, and on a very tall wearer, where a standard knit body is short enough that the shirt hem shows 4 inches instead of 2.
The last failure is the shirt sleeve. Sleeve length is measured from the shoulder seam to the cuff, and a shirt cut for a jacket, where half an inch of cuff is meant to show, may show nothing under a knit with a long sleeve. Compare the two sleeve lengths before blaming the knit. A shirt sleeve cannot be let down far: the cuff has already used most of the turn-up.
What the layer costs
A shirt worn under a knit wears at the collar and the cuff, not the body. The collar rubs against the neck rib and the cuff against the knit cuff, and those are the first places to fray. The knit pays in the opposite direction. It stretches at the neck and cuff from being pulled over a shirt, and a fine merino pulled on and off five days a week will loosen at the neck within a season unless it is washed and dried flat so the stitch can recover.
That is the argument for keeping one shirt and one knit as a dedicated pair rather than rotating the whole wardrobe through the formula. The pair that fits at all three points is worth repeating, and repeating it is cheaper than replacing the pieces that a mismatched partner stretched.
Frequently asked
- What gauge knit works best over a shirt?
- A 12-gauge knit, or anything finer, sits over a cotton shirt without crushing the collar or flattening the chest. A 7-gauge adds noticeable bulk and starts to compress the shirt; a 5-gauge will not layer over a shirt cleanly.
- Which collar works under a crew neck?
- A button-down collar is the most reliable, because the buttons hold the points down while the knit goes on. A point collar with 2.75-inch points also works if the knit neck opening is at least half an inch wider than the collar spread.
- Should the shirt cuff show below the knit?
- Half an inch is enough. More than that looks like the sleeve was pulled down, and less looks like the shirt is too short. A ribbed knit cuff holds the shirt sleeve in place better than a plain cuff.